 |
|
 09-29-2016, 03:52 PM
|
#1
|
|
Ebearnezer Scrooge/Power Member/Lips
Join Date: May 2006
Location: Hamilton, Mercer county
Posts: 4,141
|
1969 Chevy Suburban
I forgot to put this up on here and someone on another board just asked for updates. I am just going to copy and paste my posts for now. Figured some people would like to see it.
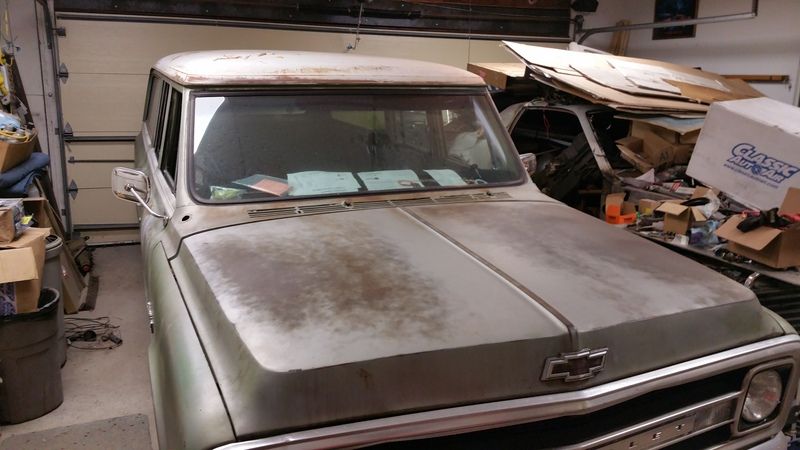
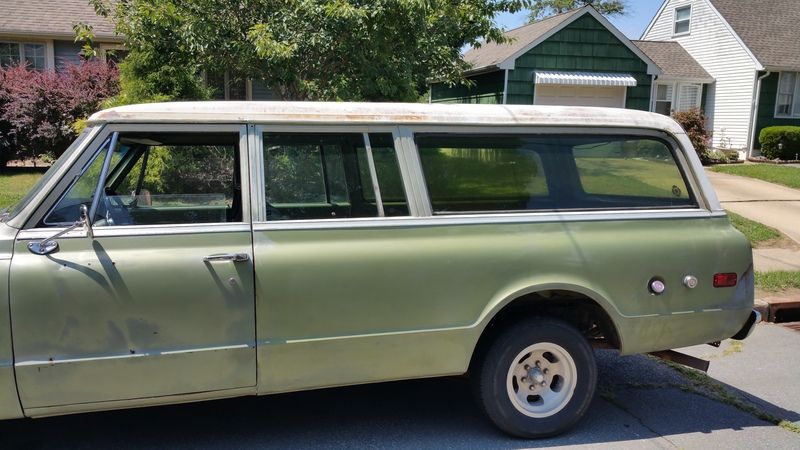
I just bought this last weekend. It is very straight Arizona vehicle, no rust except the hatch. Drove 10 hours each way to get it. it has a newwer 454 (80's vehicle) with a TH400. Speedo is broken but I used a GPS app on my phone for the trip. Best fuel mileage was 12.4 with an average of around 11 I think. Not bad considering average speed was 67mph too.
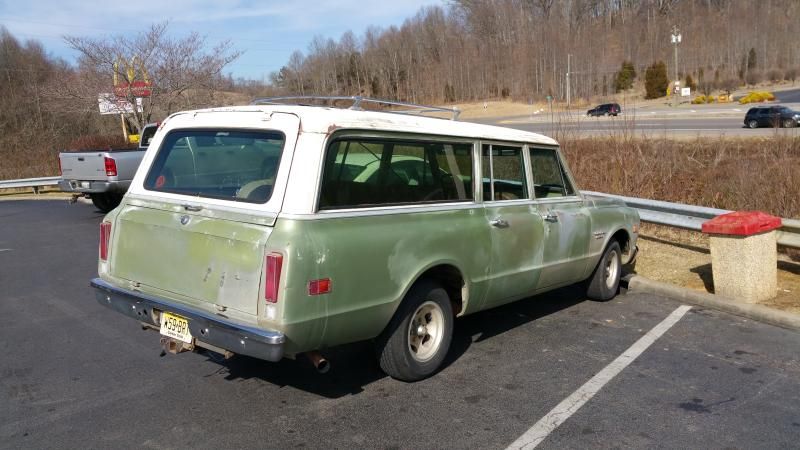
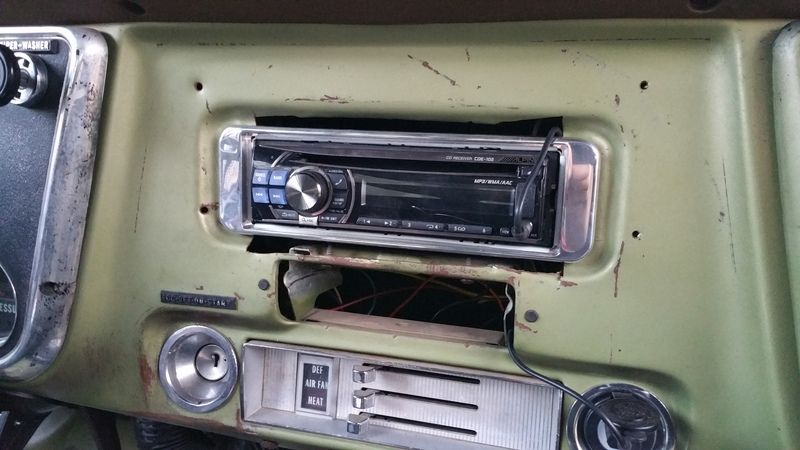
It has a bunch of weird and goofy things done to it, but nothing that isn't reversible. There are 4 holes in the passenger side toe board, they had installed car mirrors in the upper trim so there are 4 holes in it. The took the mirror down and put up one of those NASCAR wide angle mirrors, which I really like now, there are no blind spots from the drivers seat. They also cut the dash for a radio, because they were too lazy to put it in from underneath it looks like, so not only is it cut for a radio with knobs, but it is also bent up.
Underneath is super clean. I want to take off the roof rack and paint the roof right away and fix a spot in the drip rail. Then it will be full paint I think, I am thinking Citrus green from the 71 Camaro with a white stripe on the side. Atp said Mar-K will do custom side trim, so I think I will go that route too. I want to put in a AAW update harness since I already have it, Dakota Digital VHX gauge package DD Cruise, put some power door locks and an Advanced Keys alarm/keyless entry. I also put regular registration so I can drive it every day. It will be my other daily driver.
Last edited by PolarBear; 09-29-2016 at 03:54 PM.
|

|

|
 09-29-2016, 03:52 PM
|
#2
|
|
Ebearnezer Scrooge/Power Member/Lips
Join Date: May 2006
Location: Hamilton, Mercer county
Posts: 4,141
|
No additional pictures, but now that it is warming up and I was able to put the truck in the side yard, I should be able to get some soon.
I have put around 1,500 miles on it now, mostly on two separate trips. I drove about 600 miles this weekend to pick up an old vacuum tube radio with my friend from his grandparents house in PA and we got a load of wood from the Amish to bring back to his brothers house. The big block hardly knew there was any additional weight in the burb, but the suspension would bottom out on the suspension bumpers on the crappy back roads. I also still averaged 11mpg with the speed about 70mph the whole way. I don't think that's too bad for a 454 with a TH400 and no "overdrive" except the 3.07 rear gears.
I also bought a bunch of stuff to fix/replace since basically everything that is rubber is hard, dried and cracked. I had a friend do the rear pinion seal, since it was leaking a lot. That too was hard, dried and cracked and the new seal did the trick. It failed emissions though, my friend and uncle say it should pass the HC once I change the plugs. I am skeptical, but I have known to be wrong.
I can't wait to put the new weather stripping in as most of the windows rattle and since I took the rubber mat out and the door panels off for the speaker install, it was SUPER loud on the trip. I seriously had to wear ear plugs since I already hear ringing all the time. I also got 100 square feet of Mass Loaded Vinyl, 80 square feet of Fatmat, a lot of closed cell foam to decouple the MLV from the floor and a carpet kit from ACC with the Mass Backing. I also got 300 square feet of Thinsulate to put on the floor to insulate and it should help with reduce some of the echo inside, but I am not sure how well it will work if I go with the idea of using a cabinet grade veneer plywood.
I also got the roof rack off, and all the holes in the roof welded shut. Next will be to weld all the extra "old mirror" holes in the door, the misc holes in the floor (no idea what they are for/from) and then I can truly soundproof the interior. At the very least I hope to eliminate most of the road noise through the floor, since it will be a bit difficult to completely soundproof the doors and quarter panels since the door panels don't completely cover the door. I'll get some Fatmat on the door skin and try to hang some MLV on the inside of the door, and behind the panel.
I would like to figure out what weatherstripping I can use to stop the wind noise around the door gaps to the body too. Anyone have any ideas?
|

|

|
 09-29-2016, 03:53 PM
|
#3
|
|
Ebearnezer Scrooge/Power Member/Lips
Join Date: May 2006
Location: Hamilton, Mercer county
Posts: 4,141
|
Thanks for the bump. I have done a LOT to the truck since the last post. I forgot to update the thread, unfortunately I don't have many pictures to add, I just went through my phone and I don't take a lot of progress pictures. I have been daily driving the Suburban since my 92 Firebird crapped out a water pump gasket and I took the ENTIRE car apart.
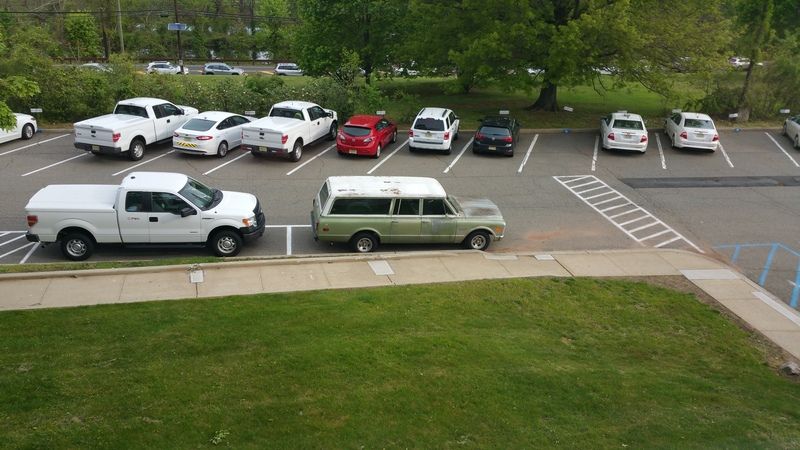
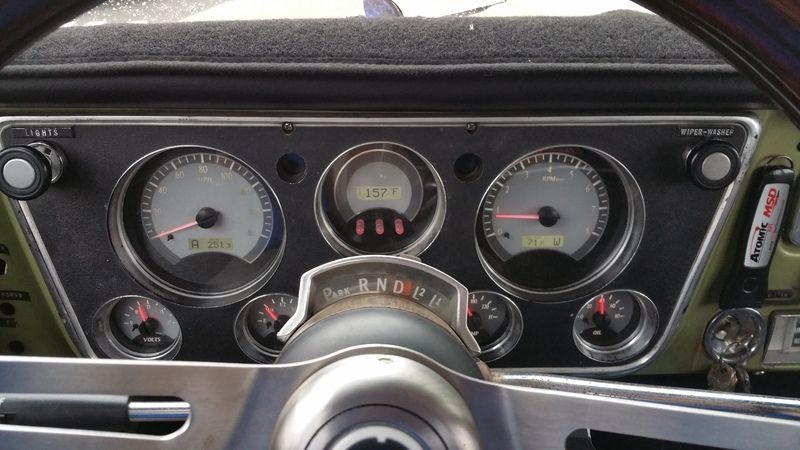
I have put in an AAW classic update wiring harness, a Dakota Digital VHX cluster, GPS speedo, DD cruise control, my keyless approach alarm system, Alpine head unit and Sirius radio from my Firebird since I have lifetime subscription on that Sirius unit. I got the radio bezel from the guy on the board here, it cleaned up the opening a lot since someone hacked the opening to put a factory style radio in it, friggin moron. I may wind up putting in a double din head unit instead of replacing the dash with the non-cut one that I got with the Burb, time will tell, but I like gadgets that aren't critical.
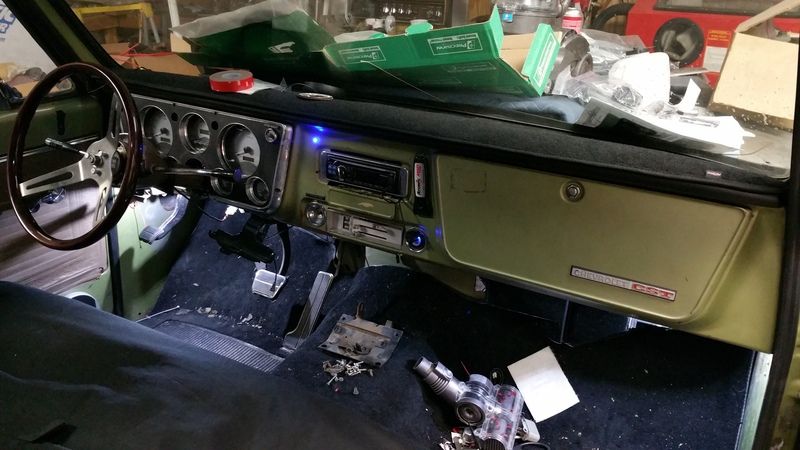
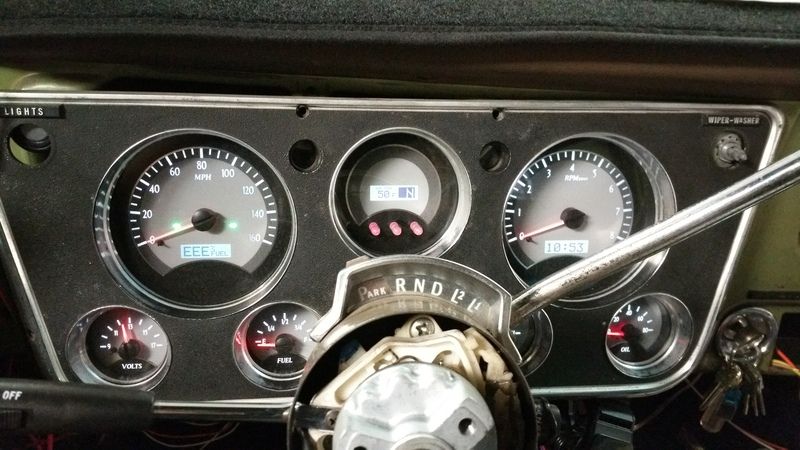
New dash pad, carpet dash cover since the dash is really ugly. New vents
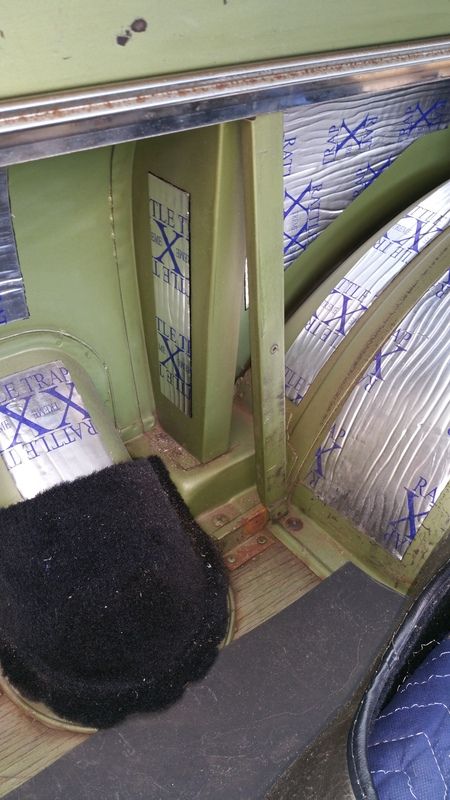
I installed my Holley TBI injection and a 40 gallon tank from (I think) an 88 Suburban with an in-tank fuel pump. I put in hard stainless fuel lines with the flexible lines braided stainless over Teflon for longevity. I punctured and fixed the radiator taking the front clip back on, DOH! All the carpet is in, but it isn't finished because I have to make the interior panels still and finish the vibration and sound treatment inside the quarter panels, I only finished one side before my car needed work, plus all the rat poop/pee in the quarters needed to be cleaned and started to smell again when I got it wet, so I need to re-visit the RH quarter with some tub and tile cleaner or something better than the Simple green. I also welded in the heater delete plate from Porterbuilt and installed my Classic Auto Air heater box. I did the weather strip on the 3rd door and the passenger side door, welded the other mirror holes in the pass door and vibration treated and rust prevention treated the inside of the door along with the "4th" door quarter area. I will have to pull the 3rd door apart again and scrape all the factory vibration treatment and then do my vibration and rust prevention treatment at a later time.
Just last night I installed an overflow for the cooling system since the radiator was low on fluid , so I think it has been puking it out here and there. I don't have a fan shroud, so it may overheat slightly in traffic, but very slowly because I don't smell coolant out the exhaust and there are no drips.
I put in a new wiper motor from New Port Engineering. I bought the delay module for it, but it will require a slight modification to the dash to install since the module is so large, so that will need to be re-visited.
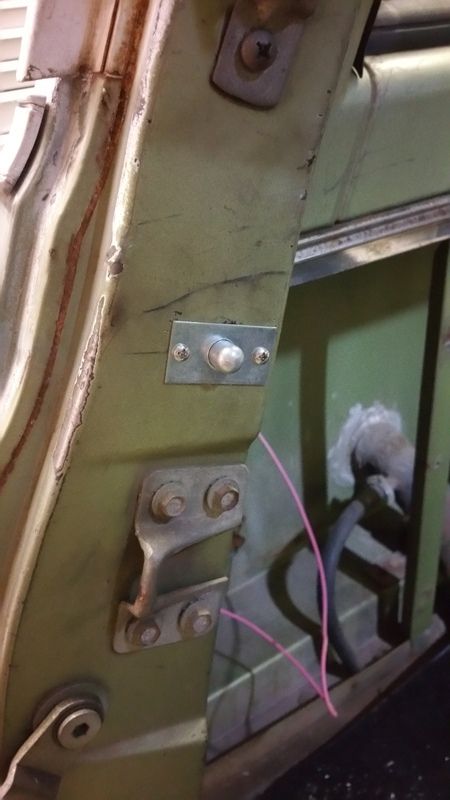
I put an LED light in the back of the cab and a push switch that is opened by the tailgate, so when I open the tail gate the light comes on. I also wired in a manual switch so I can use it inside with the gate closed. I recently realized i need to put in a cut off switch, so I can turn off the light when I have the gate open for extended periods. It hasn't been a big deal
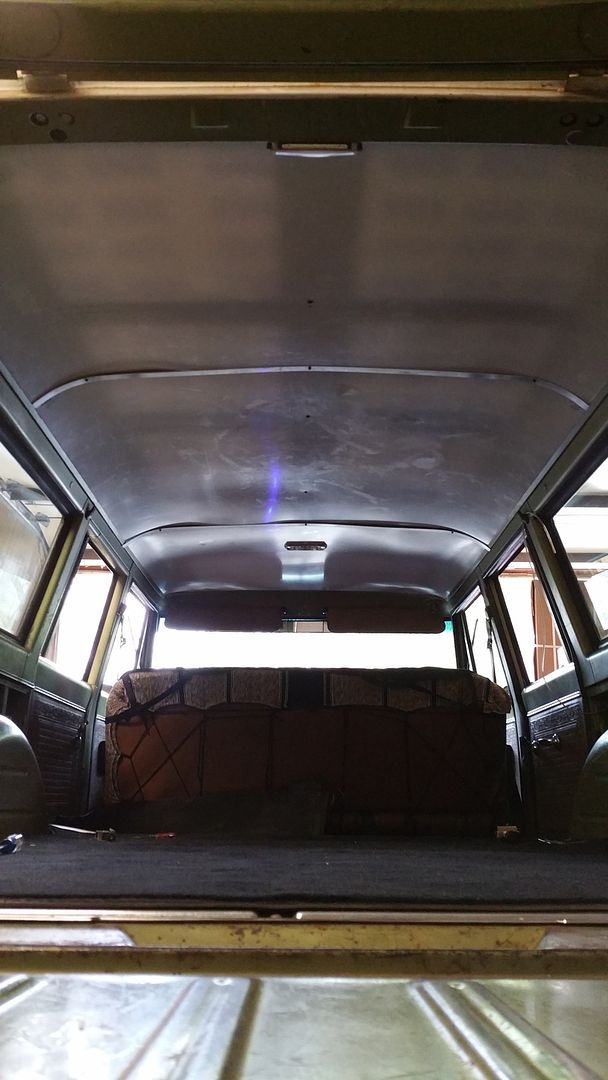
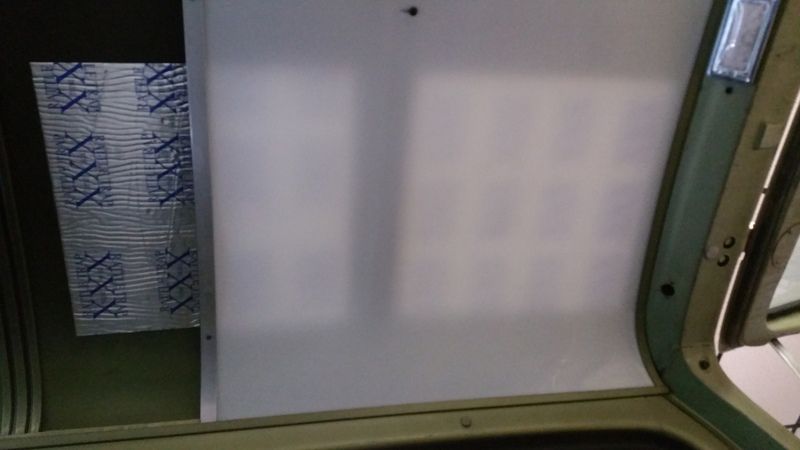
I also made my own headliner panels. I am not happy with the outcome, only because I am an overachiever. There are some places it didn't come out so well, but I only had the front panel to work with. That one came out OK, as did the rear most panel, it is mostly the middle panel that I hate, lol. Now that I am mostly done with it I learn we can buy headliner kits for the Burb, I may wind up doing that but I am going to see if I can get some of the waviness out of the spots and cover them since i already have the fabric. The "bow is an aluminum strip that I bent, so that is flat and the plastic doesn't sit right once I put the screws in place to hold it up. If I put longer screws in, that may solve the problem. You can see my vibration treatment through the panels. When I pull them back out for covering I am also going to stuff the entire cavity with Thinsulate, I bought like 100 yards of the 3/4 or 1".
A note on the AAW harness. They don't sell one specifically for the Suburban and I already had the kit that I was going to put in the truck, but since this needed it sooner I decided to use it. Everything went well, but the rear tail light harness needs more wire for the Suburban. I called AAW and got more wire and pins and I re-used all my connectors for the tail lights, they are different connectors than the truck and I wanted to have it be functionally the same as it should be. The major difference being that the reverse light on the burb is clipped onto the socket and uses a flat connector, where the truck the wire is "part of" the socket and uses a round connector.
I also have some more things to add to the Suburban when I have time. I got a set of seats from an 07 Cadillac Escalade with the heat and ventilation. I have not gotten them in because the Drivers seat is computer controlled for the memory. I recently found the wiring schematics and figured out how to make the position and lumbar controls manual. I had to get some special connector pins for the one motor controls, the other pins are just Delphi. I can post the details once I get into that. It looks like i have to take a good portion of the seat apart to get to some of the wiring. I plan on doing this as soon as I can because I hate the bench seat from these years, it hurts my ass sitting in it for long periods of time because of the seat frame.
I also have the GSI Billet handles to put on, but am waiting for their alignment washers to install in my 69, since they modeled them on the 67 door handle.
I bought some heated wipers, but that was going to be a pain to put on in the time frame I had available, so I will revisit that when I paint it most likely.
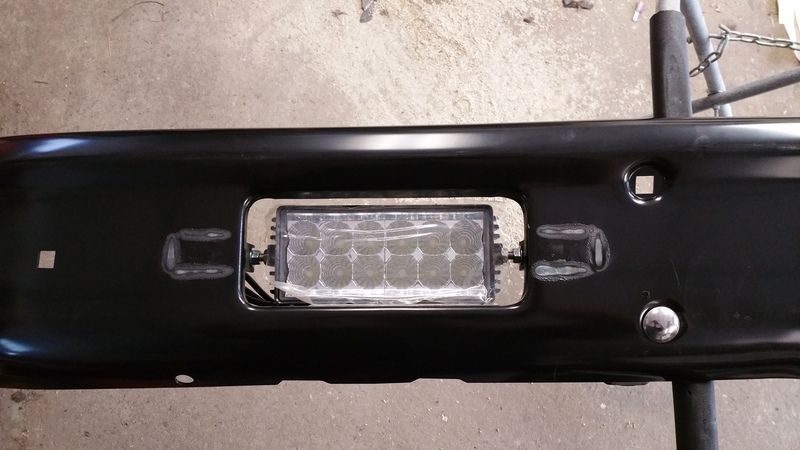
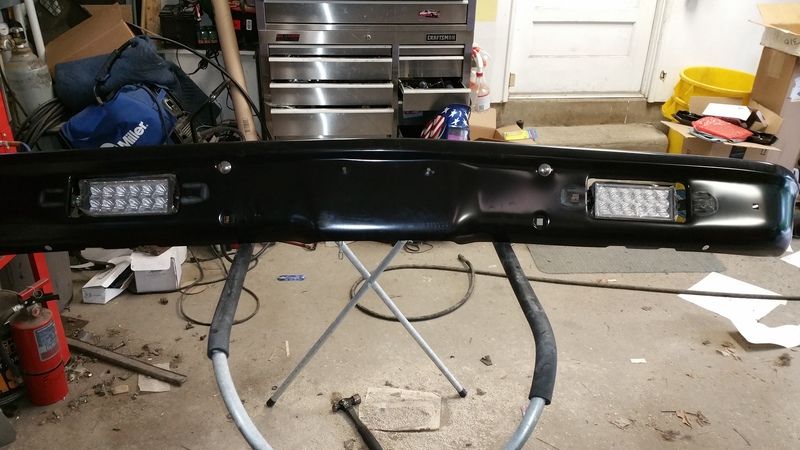
I plan on putting in power door locks with an automatic door locker module from Dakota digital, and their retained accessory module with automatic headlights/running lights. I have an inverter that I am going to install in one of the quarters and put an outlet in the panel once I make them. I also bought a 71/72 Bumper and I am mounting fog lights in the turn signal spots.
My other major project will be converting this to 4x4. I bought an 88 K30 over the summer last year for the axles and round pattern 205 transfer case. I have a C15 frame with rear leaf springs that I got with my truck bed, I plan on using that under this body, but if I find a C/K30 frame by then, I may just use that instead.
|

|

|
 09-29-2016, 03:53 PM
|
#4
|
|
Ebearnezer Scrooge/Power Member/Lips
Join Date: May 2006
Location: Hamilton, Mercer county
Posts: 4,141
|
Some more pictures I found.
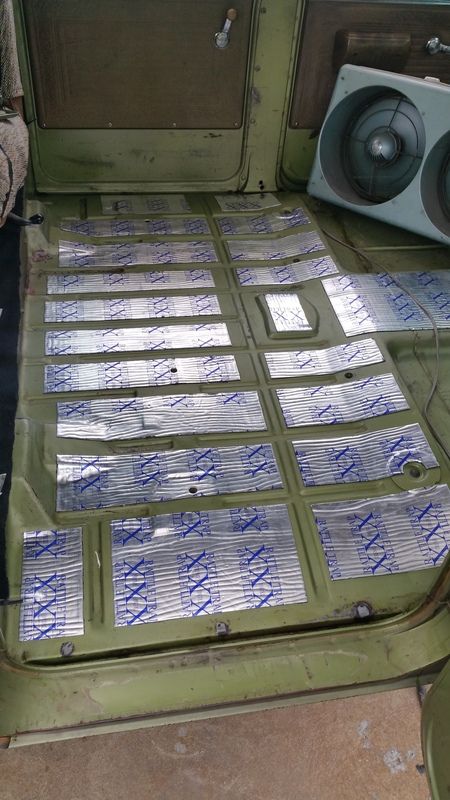
Here is the vibration treatment on the back floor
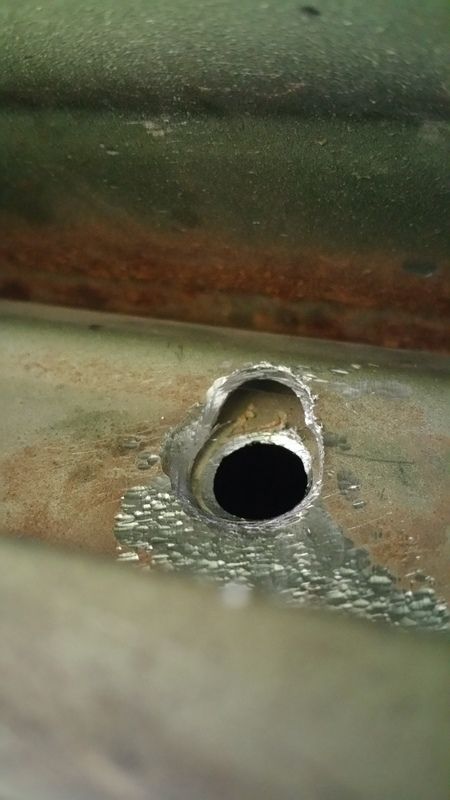
This is a hole I was able to grind in the "C" pillar behind the 4th door window so I could pass a speaker wire down to the quarter panel. There was already a hole in the top layer of steel but not in the one under it, so I got a ball tip carbide cutter and got it up there. This was actually just a picture I took so I could see my progress of the grinding. I was able to get a plastic grommet in the hole when I was done.
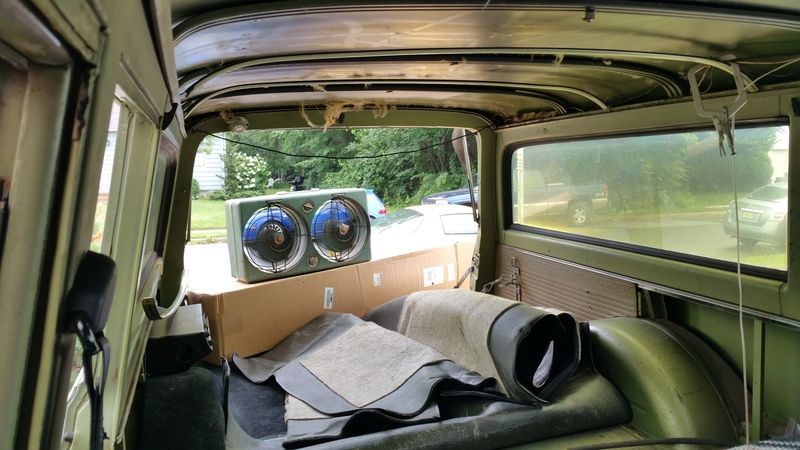
Progress of the interior work last summer
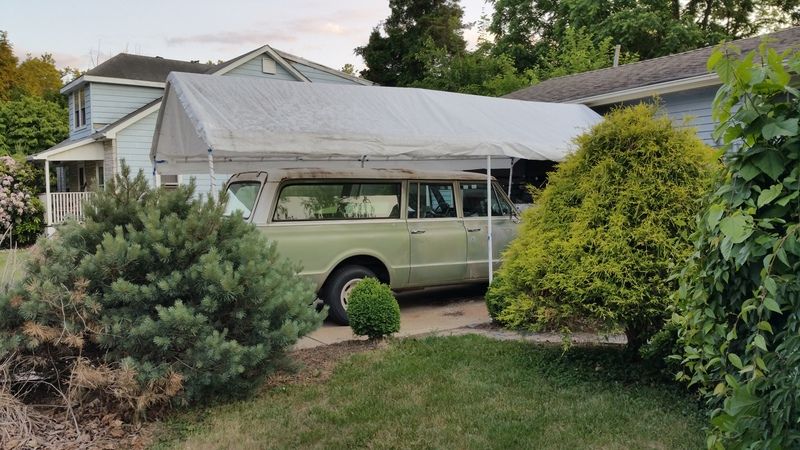
Working under a tent my uncle gave me
Friggin radio hole, ugh
|

|

|
 09-29-2016, 03:54 PM
|
#5
|
|
Ebearnezer Scrooge/Power Member/Lips
Join Date: May 2006
Location: Hamilton, Mercer county
Posts: 4,141
|
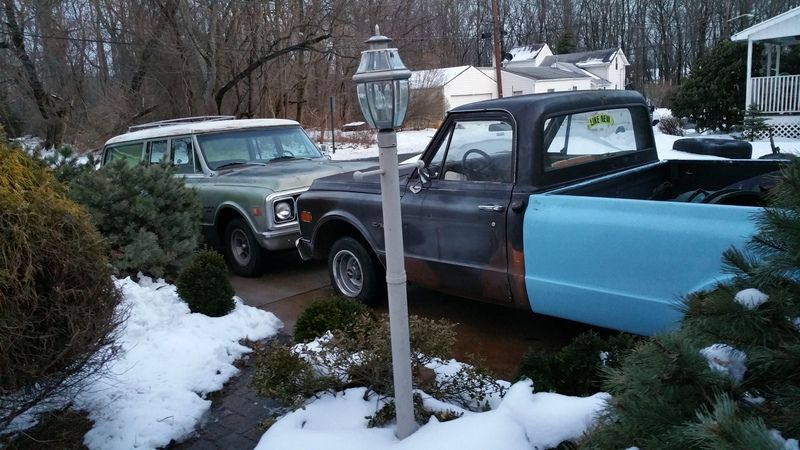
After I got it. Notice the truck is "Like new" My cousin worked at a used car place and grabbed a bunch of stickers and put them on the truck while I was at work. I kept that one because of "Irony". I think he had Navigation on the front, lol and $750 payments. When I called him about it he said it was $750 a month for like 72 months or something, LMAO
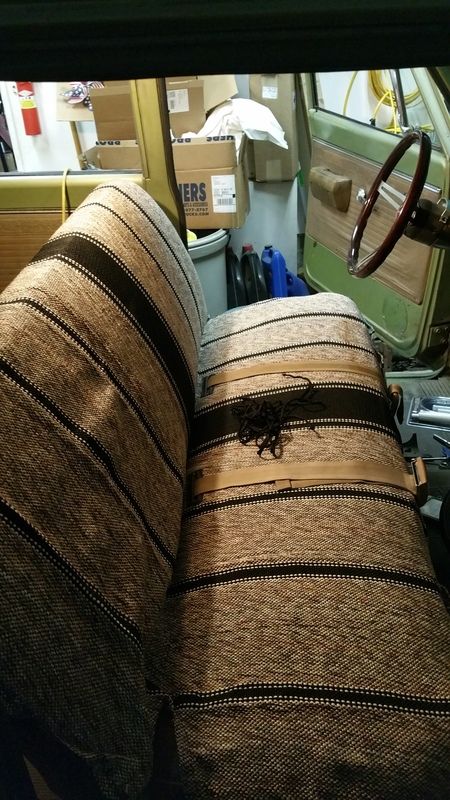
Covering the seat since the cover and foam are all messed up on the drivers side
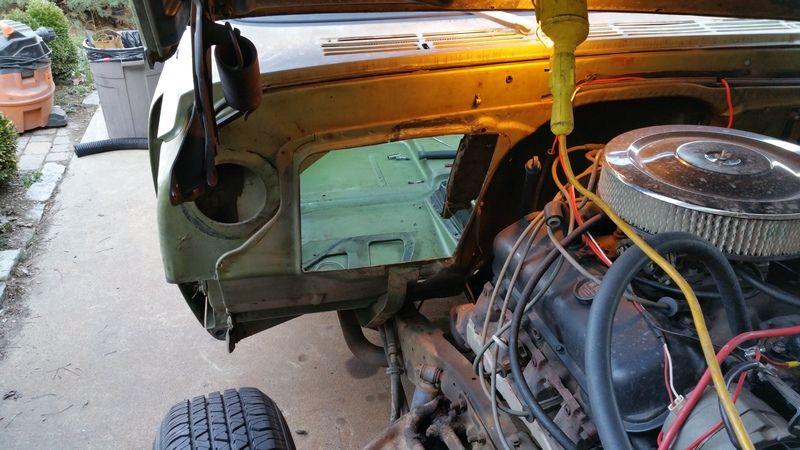
Progress for the firewall smoothing plate
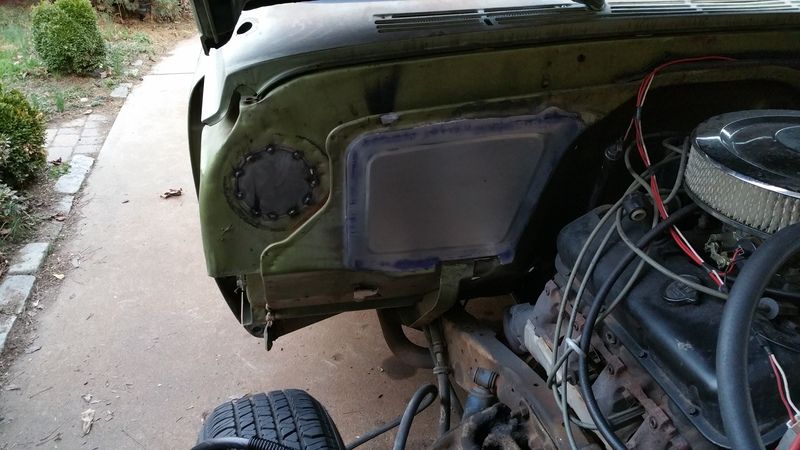
THere were extra holes from previous owners that needed filling
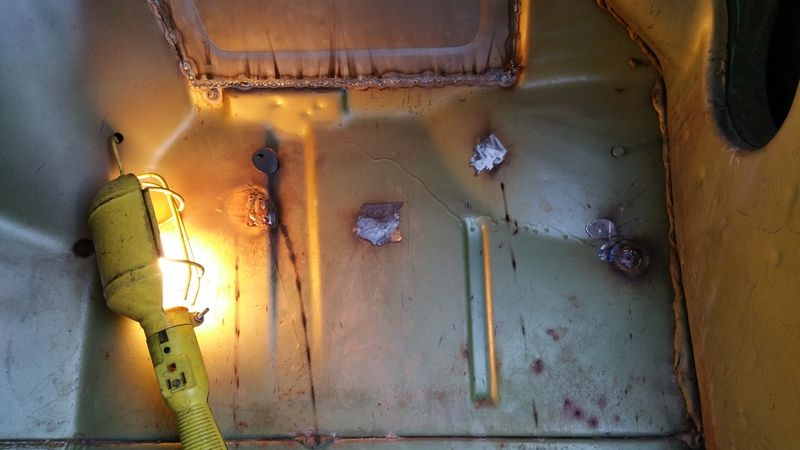
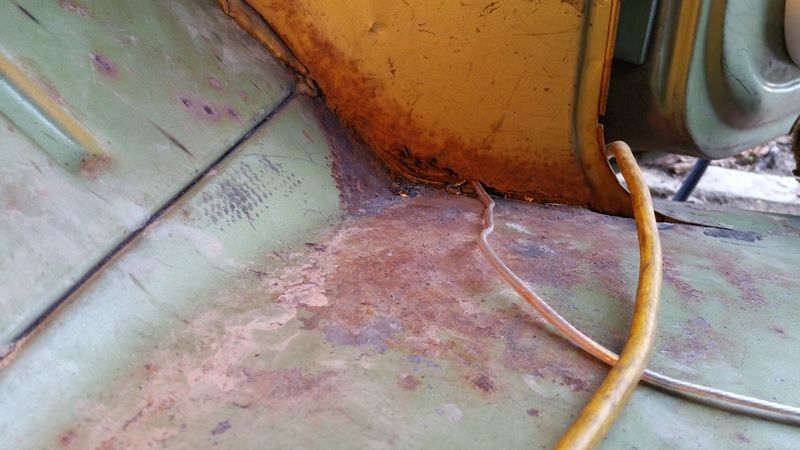
My only other "rust" spot on the entire vehicle, drivers side is similar. The windshield leaks, as does the roof because there is no seam sealer at the drip rail. I bought sealer, but have not been able to get to cleaning and preping the drip channel for sealer and the entire roof for paint. I have the expoy and paint for the roof too, stupid job and car getting in the way
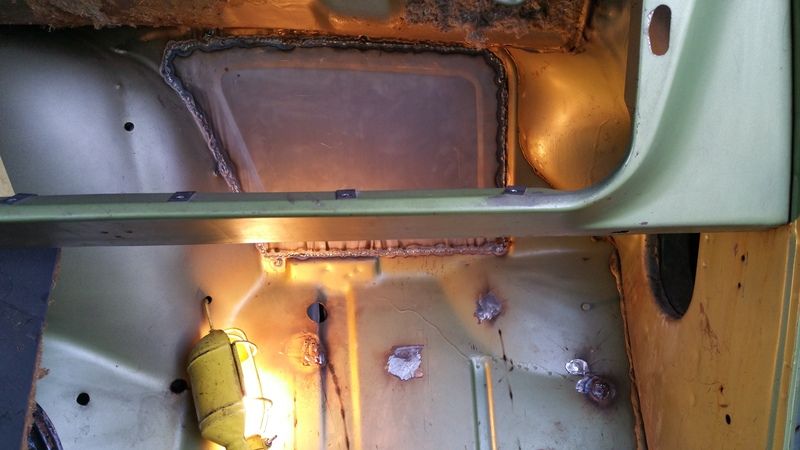
The inside shot of the Porterbuilt plate
I also installed the Morris Custom Classic 3 point seat belts. I like them but i have to change the angle of the retractor to make it easier to pull out when putting it on.
Here is the 40 gallon fuel tank. Fit very well, I just had to move the rear cross brace that the strap is mounted on in the picture. It was like it was made to be in that spot since there were already holes for it in the bottom of the frame, I think the top too, but I don't remember now. At the front I slit a length of fuel hose to put on the front brace since the stamping faced the tank and I didn't want it to abraid the tank. Also since the parting line/height for the tank is more than stock, so I welded tow pieces of rectangle tube, I salvaged them from my old treadmill, lol. They just limit the amount that the tank can go up. I lined them up with the humps at the top of the tank. Attaching the fuel lines is a bit of a pain, I kind of have to have the tank half way installed, it's because of the stiffness of the braided lines. Also for the filler neck, I used a couple of 90 degree hose bends and a reducer since the tank filler is larger than the body side. I was able to also hook up the filler vent.
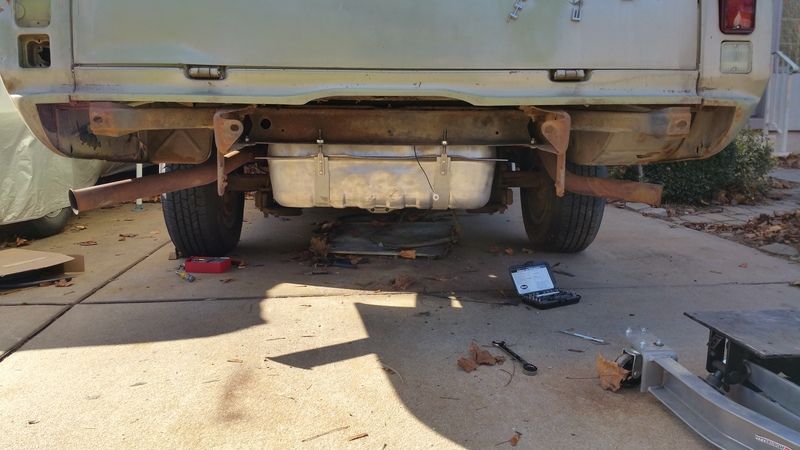
The worst part was trying to tighten the filler hose clamps since I couldn't connect the hose until it was installed in place and with the reducer and two bends there 4 hose clamps, and 2 were very hard to reach with the body in the way.
Oh, I still have roof rack I don't want, lol. It is just taking space in my bedroom. I guess I can take it apart completely to ship it if someone wanted it, lol.
|

|

|
 09-29-2016, 04:22 PM
|
#6
|
|
Meet Coordinator
Join Date: Jan 2008
Location: brick/pt. pleasant beach
Posts: 19,341
|
Love it!!!!!!!!!!!
|

|

|
 09-29-2016, 06:21 PM
|
#7
|
|
Ebearnezer Scrooge/Power Member/Lips
Join Date: May 2006
Location: Hamilton, Mercer county
Posts: 4,141
|
Here is the tailgate button switch.
From today, this is the cluster completely installed and everything working
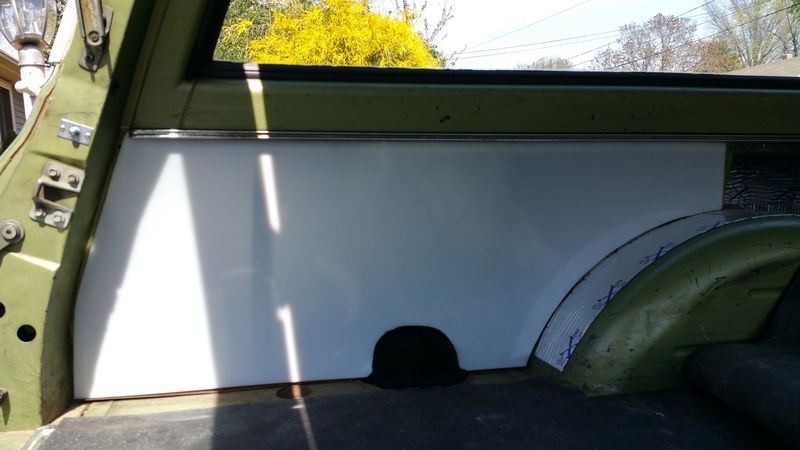
Vibration treatment in the quarters
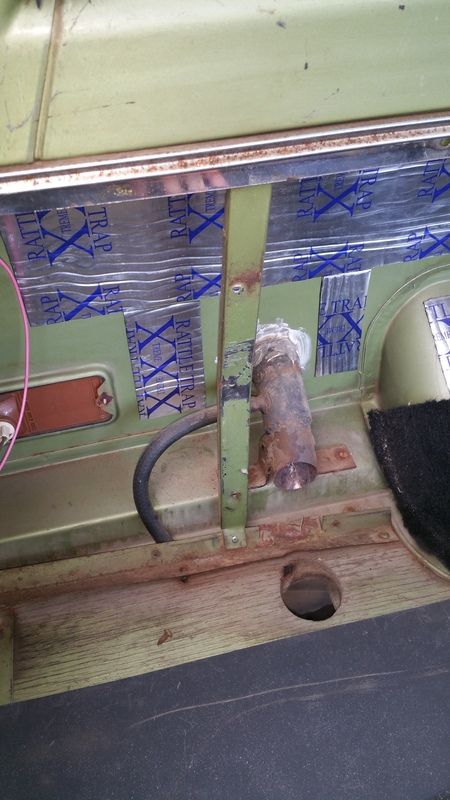
Has a dealer? installed 2nd tank that I took out in favor of the 40
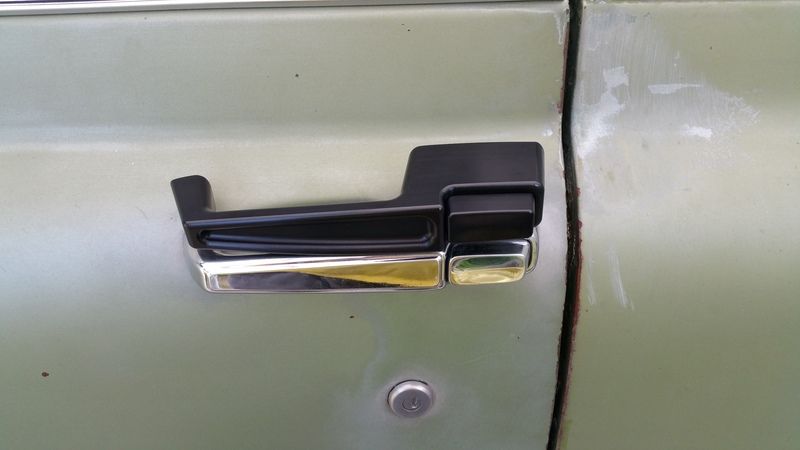
The billet handle waiting to go on
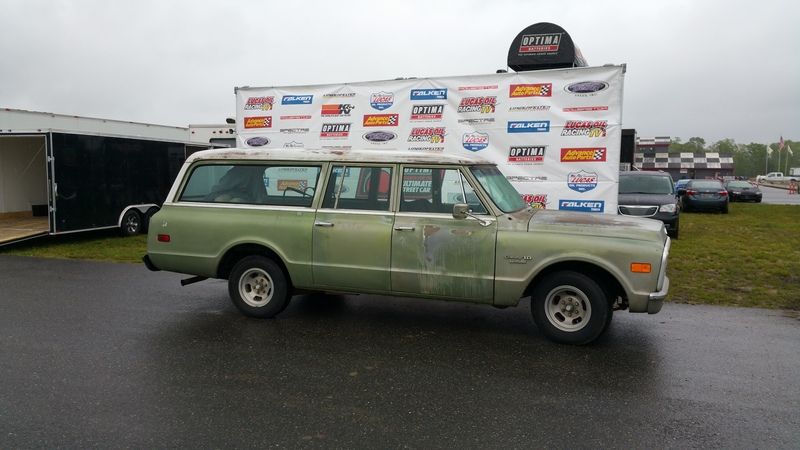
At an Ultimate Street Car search event here in NJ
Getting the fog light setup in the bumper
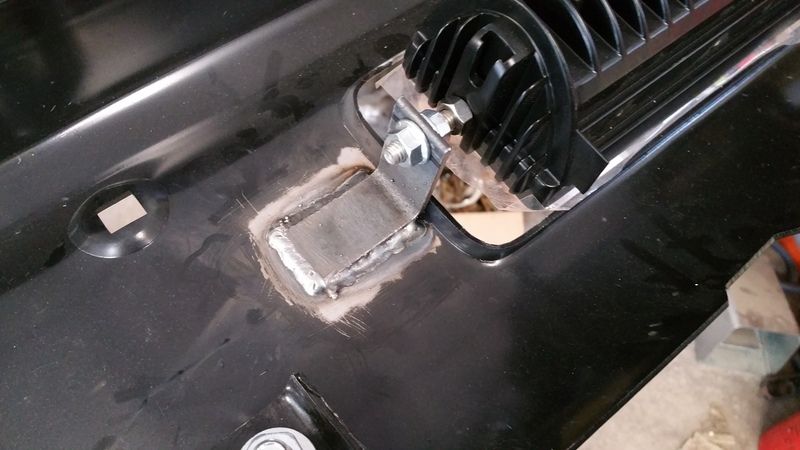
Burned the bracket in a little too hot, but it's not going to come off, lol. The weld shows greatly on the front and I will have to do some grinding and put some filler over that, or put a couple of coats of epoxy and block it out
Headliner
Started on one interior panel
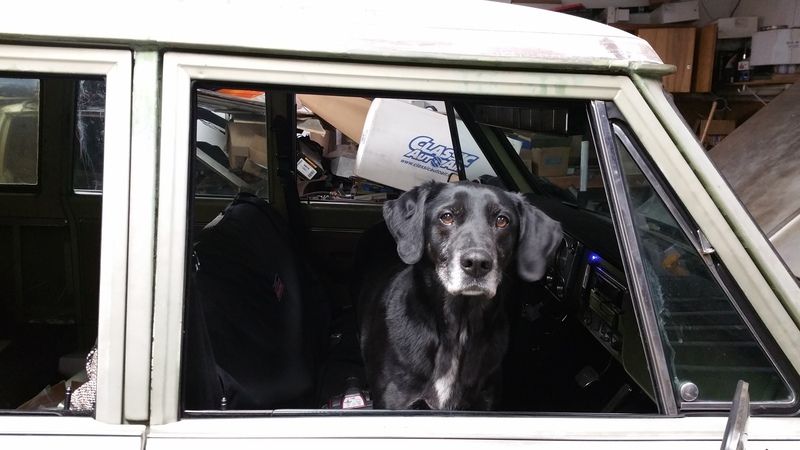
My best friend, lol
|

|

|
 09-30-2016, 08:23 AM
|
#8
|
|
11 Second Club
Join Date: Feb 2008
Location: Edison, NJ
Posts: 4,619
|
I like it.
__________________
1999 Z28 Convertible. 6 speed swap, wide cowl hood, full hockey stripes, and a whining 10 bolt.
2008 Sierra Vortec Max. 6.2 swapped, headers, Magnaflow catback, GMPP CAI, NHT optioned tow package.
2006 GTO, 11.48 @ 118.3
|

|

|
 09-30-2016, 08:26 AM
|
#9
|
|
Lord of the rings / 10 Second Club / Meet Coordinator
Join Date: Aug 2004
Location: Millstone Township, NJ
Posts: 6,360
|
Really neat truck. I dig it.
__________________
 97 T/A Ram Air Convt
Forever dyno queen / 777rwhp 662 rwtq @ 17lbs / 10.2 @ 140
'24 Corvette Z06
17 Sierra 2500HD Dmax
81 Turbo TA
|

|

|
 10-01-2016, 09:28 AM
|
#10
|
|
Power Member / trans break does not equal transbrake
Join Date: May 2009
Location: The Meadowlands
Posts: 4,513
|
That thing is cool !
__________________
99 Z28 - SBE LS1/60e
Motor - 10.84 @ 128 - 1.47 60'
Nitrous - 10.16 @ 132 - 1.40 60"
|

|

|
 10-02-2016, 05:52 PM
|
#11
|
|
Resident Camera Guy

Join Date: Aug 2004
Location: North Jersey
Posts: 10,971
|
Love it!
__________________

|

|

|
 05-10-2017, 12:59 PM
|
#12
|
|
Meet Coordinator
Join Date: Jan 2008
Location: brick/pt. pleasant beach
Posts: 19,341
|
6 month update required 
|

|

|
 05-10-2017, 01:31 PM
|
#13
|
|
Ebearnezer Scrooge/Power Member/Lips
Join Date: May 2006
Location: Hamilton, Mercer county
Posts: 4,141
|
Quote:
Originally Posted by sweetbmxrider

6 month update required  |
I drive it every day and get 8 mpg to/from work 
I haven't done anything to it except change the fluids and clean the windows since I took the Firebird apart. Since I have bought it I have put almost 13,000 miles on it!
I will be starting on the 4wd conversion once I finish the car though, so expect to see some updates on the Burb soon. I will be ordering the front leaf spring brackets, rear axle brackets and shocks in the next week or so, then I can start getting the frame ready. I will need to remove the radiator support brackets from the frame I have, add the body mounts I have gotten from another suburban frame and add the rear 19" of suburban frame to the truck frame, plus cut the holes for the front shackle hangars and remove the old provisions for the parking brake to change the 2wd rear leaf frame to a K frame. I will also need to put the guts from the 14 bolt FF that came in the K30 I parted into the new housing I bought, the "old" axle is rotted to crap around the spring mounts. The GM spring mounts have the U bolt come from the top and the plate is stamped and water/crap sits in there and rots the bracket and housing away. I will be flipping the U bolts so they point upwards on this new housing. I will also be buying some 32" tires, but I haven't decided on stock 67-72 K height suspension, or a 2" lift. I think I will gain about 1" of height over a stock K10/20 since the axles I have are from a 30, so the tubes are bigger diameter. I have the front springs from the 88 K30, but they are longer than springs from a 67-72, so I am not sure whether they will work in the B52 mounts I am buying from DIY4x. I will have to see once I have parts and things mounted on the frame.
Last edited by PolarBear; 05-10-2017 at 01:41 PM.
|

|

|
 05-11-2017, 06:33 AM
|
#14
|
|
^^^Lover of bad cars^^^ Meet Coordinator
Join Date: Aug 2007
Location: Whitehouse Station
Posts: 2,260
|
It's like a wagon but better lol nice work man keep it up
__________________
1986 Honda VFR750 - 89.3HP to the wheel
2000 Trans Am M6 - Mods: Yes.
2018 Durango R/T - AFE Intake, JLT Catch Can, Stainless Works Catback, Vinyl Dodge Racing Stripes
2003 Toyota Matrix XRS M6 - Lol

|

|

|
 05-11-2017, 09:11 AM
|
#15
|
|
Ebearnezer Scrooge/Power Member/Lips
Join Date: May 2006
Location: Hamilton, Mercer county
Posts: 4,141
|
Quote:
Originally Posted by ThoR294

It's like a wagon but better lol nice work man keep it up
|
It's a truck but on my title in NJ it says Wagon 
|

|

|
 07-05-2017, 09:45 PM
|
#16
|
|
Ebearnezer Scrooge/Power Member/Lips
Join Date: May 2006
Location: Hamilton, Mercer county
Posts: 4,141
|
Got the rear windows (except the back window) tinted today, 5% out back. Looks great.
I didn't get the rear window tinted because I have to change the rear seal still, but before I do that I have to put the new hatch I got onto the vehicle and have it repaired, so that will take a while as I still have some things to do to finish up the Banana. I also didn't do the front windows since I have to change the seals in the driver door. I have to weld up some holes in the door skin and whatnot, so that will also take a bit more time until I get to that point.
|

|

|
 07-06-2017, 07:37 AM
|
#17
|
|
Power Member / trans break does not equal transbrake
Join Date: May 2009
Location: The Meadowlands
Posts: 4,513
|
how much was it to tint that monster ?
__________________
99 Z28 - SBE LS1/60e
Motor - 10.84 @ 128 - 1.47 60'
Nitrous - 10.16 @ 132 - 1.40 60"
|

|

|
 07-06-2017, 08:20 AM
|
#18
|
|
Ebearnezer Scrooge/Power Member/Lips
Join Date: May 2006
Location: Hamilton, Mercer county
Posts: 4,141
|
Quote:
Originally Posted by LS1ow

how much was it to tint that monster ?
|
The owner gave me a quote for $475. Since I only got some of the windows done right now I only paid $330, but the one guy kept complaining that the owner quoted me too low at 475. I thought these windows were going to take them like 8 hours, but they did them in 3, I think with two guys doing it, one on each side of the vehicle. I think normally it would be at least $600.
|

|

|
 07-08-2017, 10:16 PM
|
#19
|
Join Date: Jun 2007
Location: Arm pit of the world... NJ
Posts: 2,676
|
Quote:
Originally Posted by PolarBear

The owner gave me a quote for $475. Since I only got some of the windows done right now I only paid $330, but the one guy kept complaining that the owner quoted me too low at 475. I thought these windows were going to take them like 8 hours, but they did them in 3, I think with two guys doing it, one on each side of the vehicle. I think normally it would be at least $600.
|
Who did the tinting?
__________________
John
|

|

|
 07-10-2017, 08:24 AM
|
#20
|
|
Ebearnezer Scrooge/Power Member/Lips
Join Date: May 2006
Location: Hamilton, Mercer county
Posts: 4,141
|
Quote:
Originally Posted by Featherburner

Who did the tinting?
|
I went to Shades of Gray on PA
|

|

|
 08-02-2017, 02:49 PM
|
#21
|
|
Ebearnezer Scrooge/Power Member/Lips
Join Date: May 2006
Location: Hamilton, Mercer county
Posts: 4,141
|
I did another mod to the Suburban today. I got some gas support struts that were the proper length and a little heavy on the lifting force, but not too bad. I swapped them out for the sliding/locking supports for the rear hatch. It is a lot easier to open the rear hatch now since you only have to give it a pull and the supports open the rest of the way.
Next I am going to swap out the tailgate scissor supports for some cables, so I can use an EZDown gas support like the modern trucks come with. There is not a lot of room between the tailgate and the side of the rear hatch opening. I got the EZDown already, but the cables I ordered were too short, got some longer ones on the way now.
|

|

|
 08-22-2017, 07:20 AM
|
#22
|
|
Ebearnezer Scrooge/Power Member/Lips
Join Date: May 2006
Location: Hamilton, Mercer county
Posts: 4,141
|
Changed all the springs in the vehicle on Sunday. The front springs were small block springs, but with the big block in there I would hit the suspension bumpers occasionally and almost always going in and out of the driveway. Also, one of the front springs broke last year and I had another SBC spring, so I had put that in because I was trying to save money since I knew I was going 4x4 anyway. Well, I kind of had to change them for my Idaho trip with all the additional weight I would be carrying. I broke down and swapped out all 4. I had a rebate gift card so in all it only cost me around $110.
Now that I have driven it a little, the ride quality is MUCH better. I got the standard BBC springs for the front, and in the back I put in the linear rate "heavy duty" coil springs in the back. I am glad I went with the linear ones instead of the progressive. Now it rides more like a truck, but since the vehicle is pretty heavy to start, it doesn't ride harsh. It wasn't a complete waste of money though, I will put these springs in the truck once I get the frame swapped out from under the Suburban.
I will also be using the Burb to tow the Firebird to NJMP this weekend. Potentially, I will be camping on Saturday night in it too.
|

|

|
 10-28-2017, 08:11 PM
|
#23
|
|
Ebearnezer Scrooge/Power Member/Lips
Join Date: May 2006
Location: Hamilton, Mercer county
Posts: 4,141
|
I suppose I should chronicle the trip out to Idaho here, but for now I don't feel like it.
Today I removed all the springs off the frame while it is still on top of the Burb, to lighten it and make it easier to get down this week. The frame came from southern Commiefornia and is very rust free, all the spring bolts came out easy, which was a surprise. None of them were seized to the bushing sleeves.
The frame swap will start soon, especially since the engine isn't making any oil pressure. I wanted to get the Camaro driving, but for now I am just going to push it into the swamp and let nature reclaim it  I need the spot for the truck. I need to turn the truck around so I can pull the engine out of the truck and put it in the Burb after the frame swap. This will be temporary, so the Burb doesn't trap the garage, or driveway, while I take the Dodge apart. I want to be able to move and drive the Suburban in the mean time.
Feels good getting projects completed and parts out of the way. 
|

|

|
 11-03-2017, 11:43 AM
|
#24
|
|
Ebearnezer Scrooge/Power Member/Lips
Join Date: May 2006
Location: Hamilton, Mercer county
Posts: 4,141
|
Well, I got the frame on the ground last night with help. This weekend I will get the rack I made off of there and I think I am going to start working on taking the Burb apart for the swap
|

|

|
 11-03-2017, 12:29 PM
|
#25
|
Join Date: Sep 2008
Location: Hackettstown, NJ
Posts: 1,643
|
Just an innocent question:
How many project cars do you have?!
__________________
1998 Z-28 - SLP lid - Ported TB - LS6 Intake - Dynatech SS headers/Catted Y - Magnaflow Exh - 3.42 - Yank SS3600 - UMI weld-in subframe connectors, Adj LCA, Adj PHB, Q1A TA - Bolt-in Relocation Brackets - Strano springs - Koni shocks - 17" C6Z06 wheels - 326HP/335ft-lbs - 12.35 @ 110.41
Quote:
Originally Posted by Blackbirdws6

I can appreciate a dream but this person needed some real friends.
|
|

|

|
 Posting Rules
|
You may not post new threads
You may not post replies
You may not post attachments
You may not edit your posts
HTML code is Off
|
|
|
|
|
|

